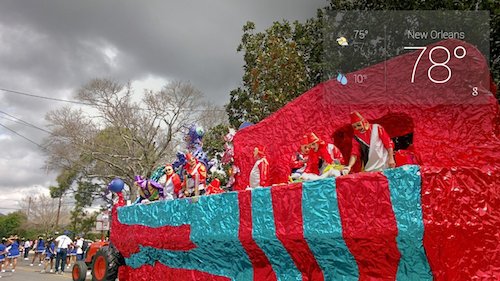
I’ve been testing Glass as part of Google’s Explorer program since last August, and over the past few weeks I have really put it through the wringer creating documentary footage of this year’s Mardi Gras in New Orleans.
While Glass is aimed more at the smartphone market than the video market, it is still a formidable tool for creating point-of-view media. It’s a boon to be able to shoot in high definition (720p) and to do it hands-free.
Today I’m going to share a few tips based on my use of Glass in the field.
Voice Commands
While it feels groovy to be able to take a picture by saying, “OK, Glass, take a picture,” there are times when voice commands are impractical. Sometimes there is simply too much background noise. Sometimes you don’t want to be loud and inappropriate, for instance, during a quiet performance piece. (See Rule #1: Don’t be a Glasshole.)
No matter what, it’s good to get comfortable with the shutter button on the frames.
- Click to take a picture
- Click and hold to start recording video
- Click a second time to extend video beyond its 10-second preset
(Also, try to avoid my most common mistake, getting my finger in the photo because my hand is in front of the camera.)
Lighting
Glass seems to work extremely well in moderately low-light conditions. Shooting video of parade floats as they pass under streetlights produces a pretty good final product. However, quality plummets as light levels decrease.
One quick-and-dirty trick I’ve been known to use is pulling out my iPhone and using the flashlight app to help light the scene. As with many things in the field, if it works, use it.
Power
Google Glass has about the same battery life as a smartphone. This means that if you are shooting a lot of pics and video, it will drain quite rapidly. When I know I’m going into the field I bring the USB cable that came with Glass and my trusty Anker Astro 3E 10000mAh charger. It’s about the same size as my iPhone and can completely recharge my Glass several times over.
I don’t like to wait for the battery to run out before recharging. Instead I slip the Anker into a pocket or my utility belt and run the cable under my shirt so it comes out at the collar and plugs right into my Glass. This not only gives me constant, uninterrupted power, but it also will begin auto-upload to the cloud whenever I’m in a known wi-fi hotspot.
Wi-Fi and Internet Access
Speaking of Internet access, I always have a backup handy. I addition to my iPhone, I also carry a wi-fi hotspot that I got from my wireless carrier. Sometimes even when the phone can’t get through I can get a data connection and not interrupt any real-time sharing I’m doing.
Syndication
Before going into the field it’s well worthwhile to make sure all your social media are set up. Activate the Instagram, Facebook, and Twitter apps and make sure you’ve got the hang of sharing to them. Keep in mind that much like voice commands, dictated captions are not always an option, so some of your content may go out with nothing more than the “#ThroughGlass” hashtag.
Utility Belt
Since I do a lot out in the field, I have a standard rig that I use, including my Anker, iPhone, hotspot, an iPad if the situation demands, charging cables, and any other custom gear required for the gig. One thing that has made my life infinitely easier is a shoulder-slung bandolier called a Runnur.
With room for all the small gadgets and an inner pocket that is perfect for the Anker, it is one of the best investments I’ve made and makes covering long events like festivals and Mardi Gras a whole lot easier.
So there you have it, a quick window into how I create media in the field using Google Glass. Have you been doing anything similar? Let us know in the comments!